Advanced Export allows you to create and manage Export Templates and Export Fields Templates for Shipment Export.
When you use Advanced Export for the first time, you will need to create at least 1 Export Template and one Export Fields Template.
Create an Export Template
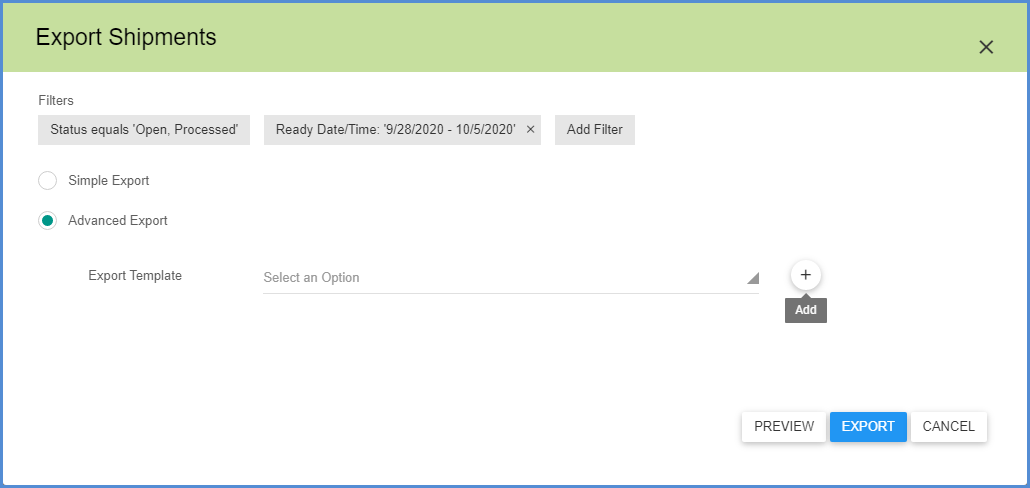
- On the Shipments page, click the Export button.
- Select Advanced Export, and click the Add button next to the Export Template field.
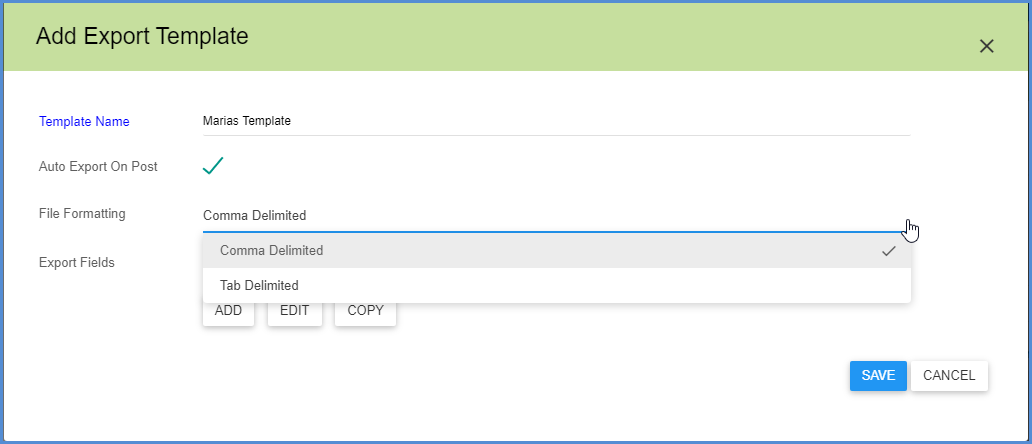
- On the Add Export Template dialog box, enter a Template Name and configure the following fields:
- Next, configure the Export Fields. Click the Add button to add the Aptean Ship shipment fields that will be exported. See Export Fields below for more information.
Export Fields
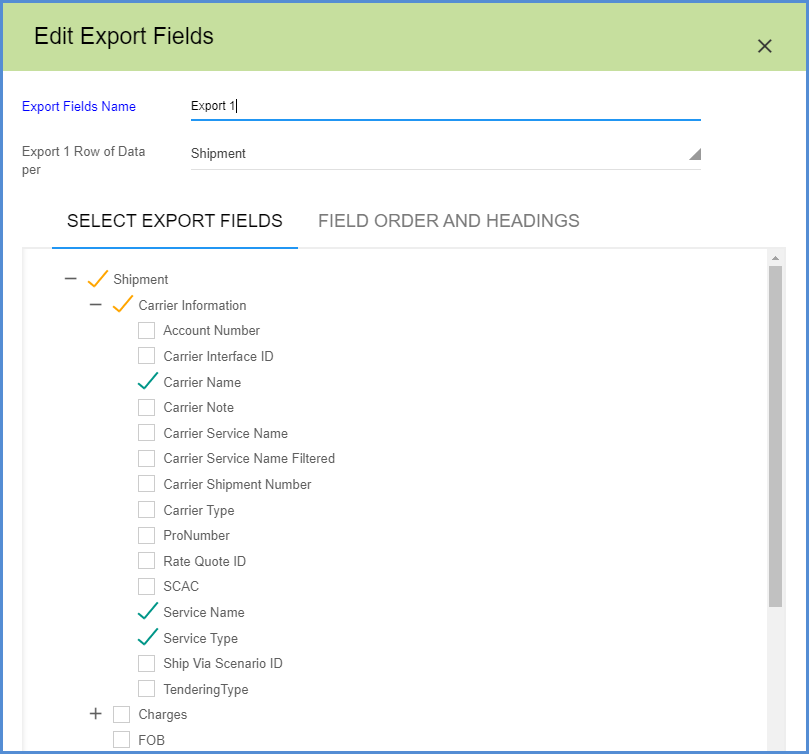
The group of Export Fields selected for this template will be saved under the name you specify in the Export Fields Name field. You can also decide whether to export one row of data per BOL Entry, Line Item, Order, Package, Pallet, Rate Quote, Reference or Shipment.
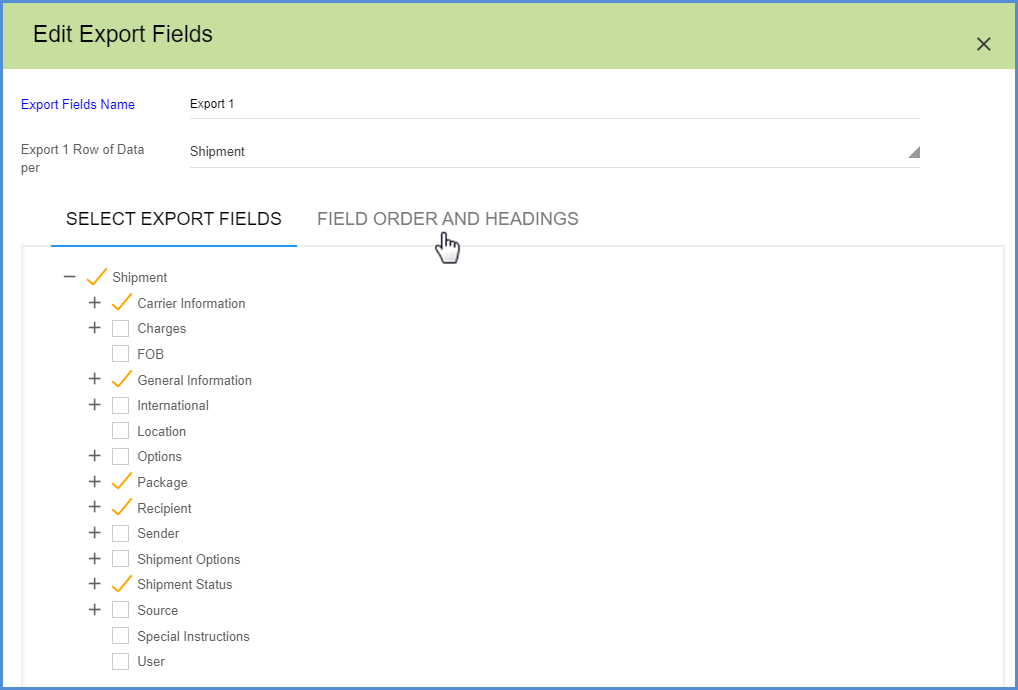
Next, select the Export Fields by expanding each section and enabling the check box next to the fields you want to include. You can select from any Aptean Ship shipment or User Definable fields.
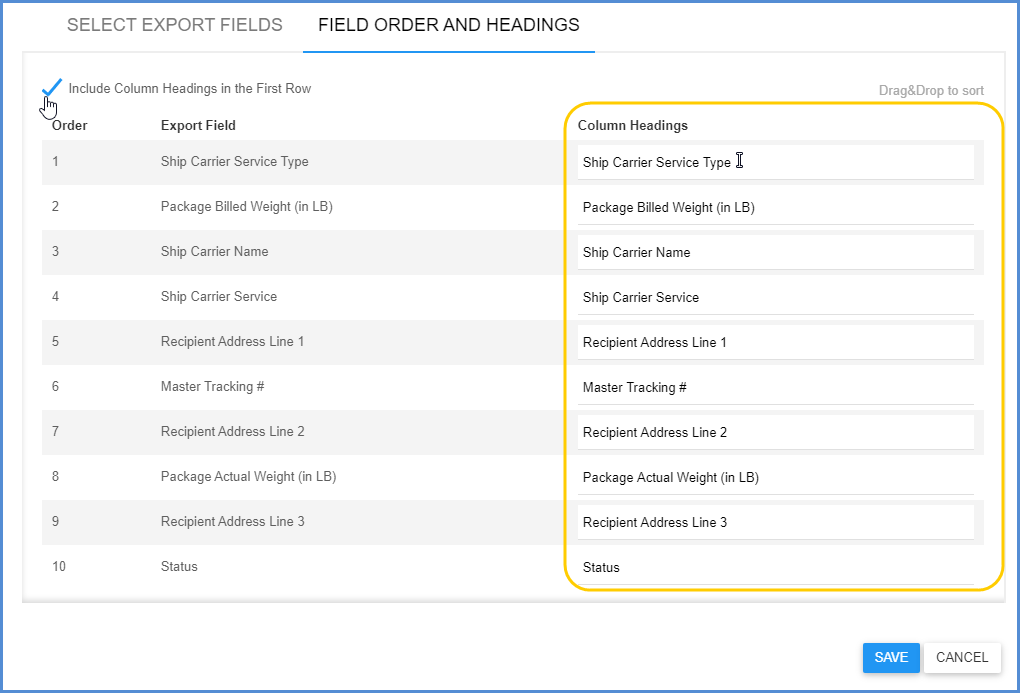
When all the fields you want to include are selected, click the Field Order and Headings page.
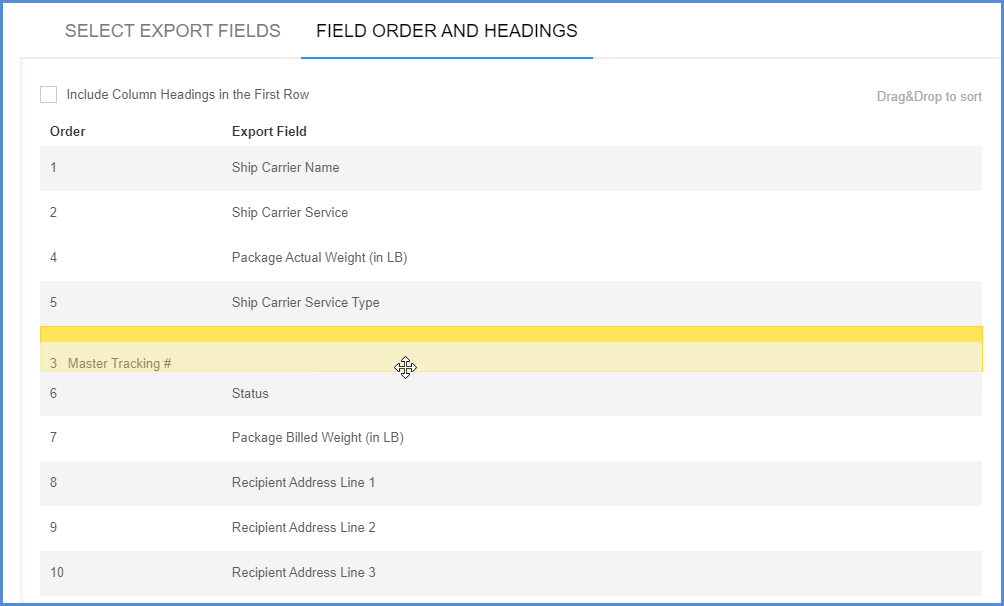
This page allows you to drag and drop the fields into the order you want them to appear in the export file.
After ordering the fields, you can choose to include the column headings as the first row of the export file. When you check the “Include Column Headings in the First Row” option, you can modify the Column Headings text. When you’re done, click Save.
Managing Export Templates and Fields
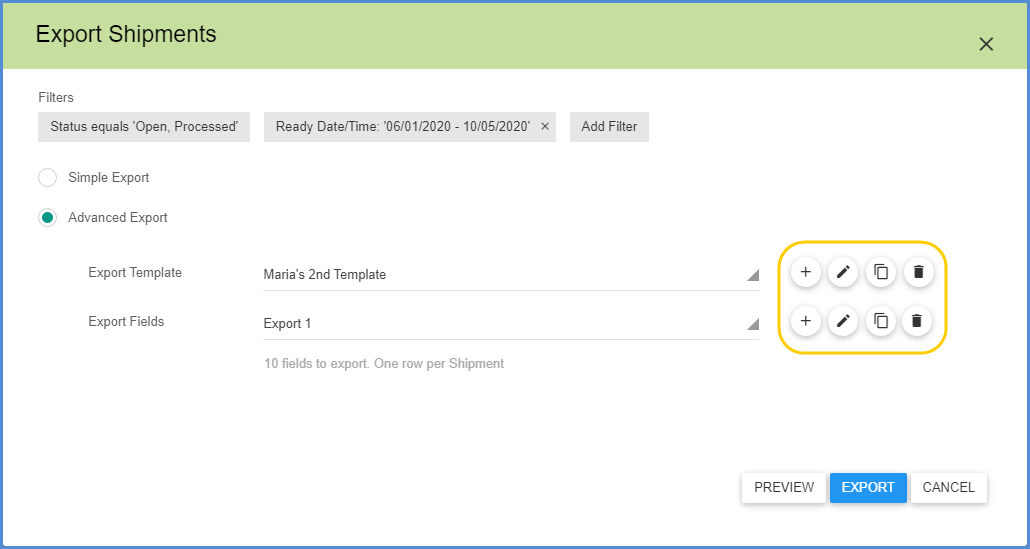
From the Export Shipments screen, you can add, edit, copy, and delete both Export Templates and Export Fields using the tool buttons.

