FedEx Rest Account Migration
FedEx now uses OAuth 2.0 for authentication (replacing legacy API keys/passwords). It improves security by issuing short-lived Access Tokens that can be refreshed.
Aptean Ship supports FedEx REST APIs such as:
- Shipping
- Tracking
- Rates
OAuth is required for all REST API communication.
Account Management
The Accounts tab lists all FedEx accounts. A checkmark in the Default column indicates the default account. Click on an account to expand details.
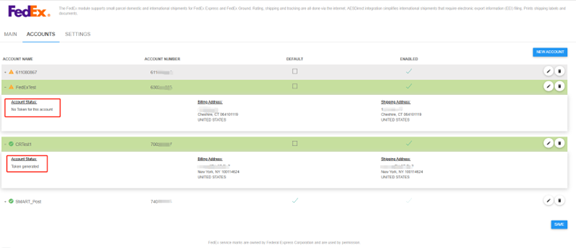 Account Status:
- Token generated → Account is ready.
- No token for this account → Token not generated. Edit the account to begin setup.
Account Information
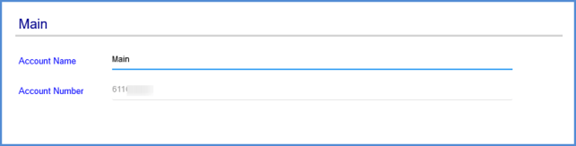
Main Section
Account Name: A friendly name used in the Aptean Ship Shipment Editor.
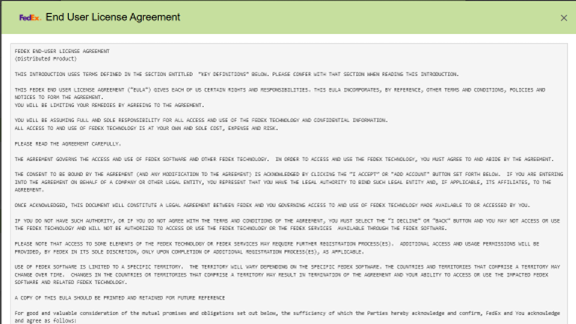
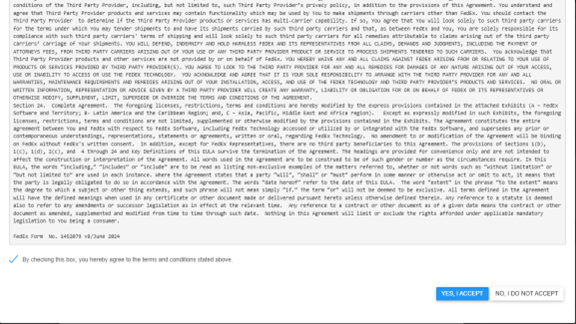
During first-time setup, you’ll be prompted to accept the FedEx End User License Agreement. Scroll through the agreement, check the box, and click Accept.
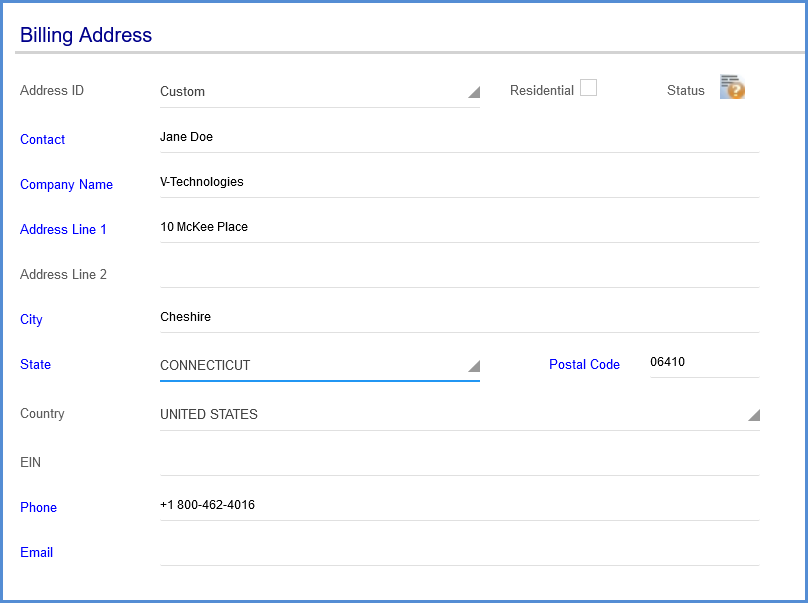
Billing Address
Enter the billing address manually or choose an Address ID from Setup > Company > Address ID.
Note: A sender email is required for FedEx Ground email notifications.
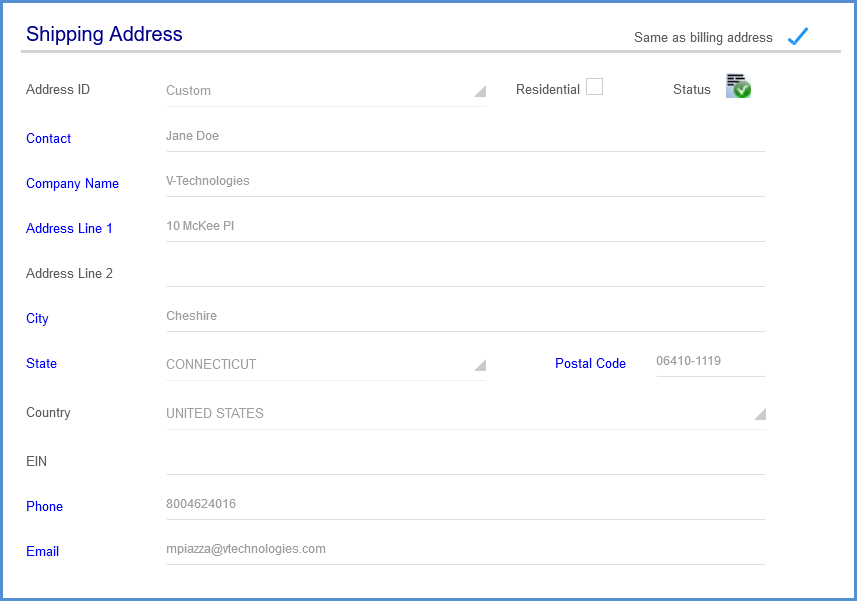
Shipping Address
On the Shipping Address screen, enter the shipper information. If the Shipping address is the same as the Billing address, check the Same as Billing Address check box.
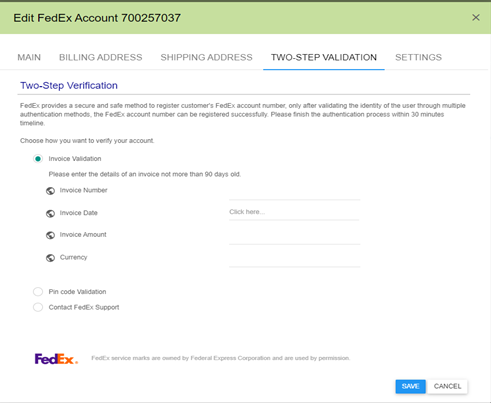
Multi-Factor Authentication (MFA)
FedEx requires MFA to validate account ownership before generating tokens. When you have validated the account address information successfully, you will be redirected to the Two-Step Validation tab to complete the MFA process. Choose one of the following:
1. Invoice Validation
- Use an invoice dated within the last 90 days.
- Required fields: Invoice Number, Invoice Date, Invoice Amount (U.S. format with decimals, e.g., 50), Currency (e.g., USD)
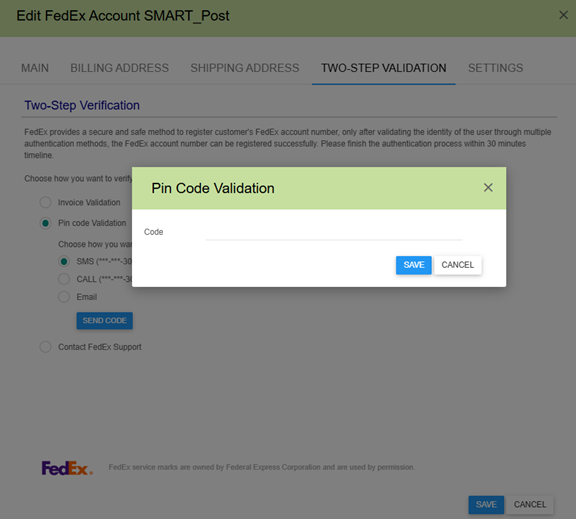
2. PIN Validation
Request a six-digit PIN to your registered phone or email. PIN is valid for 10 minutes.
If you don’t receive the PIN or can’t see the masked contact info, call FedEx Tech Support: 877-339-2774.
3. Contact FedEx Tech Support
Call 877-339-2774 and answer security questions to verify your identity. After success, click Validate Account in Aptean Ship to retry the setup.
Important: Multiple failed attempts will lock the current method for 24 hours. You may use a different available method.
After the MFA is complete, the account token is generated. Update options in the Settings tab, and your account will be ready for rates, shipping, and tracking.
Settings
These settings are configured by account and accessible when you edit the account on the Accounts page in FedEx Setup.
Account Time Zone
Set the time zone where this account is located in order to allow the account to synchronize with FedEx processing of shipments on their servers. Shipments for the account will be automatically posted at 4 a.m. in the account’s local time based on the time zone selected in this field.
FedEx Ground Economy Setup
Ground Economy must be set up for each account that will be using it. You will only see Ground Economy as a Service on the Ship screen if the account is enabled for it.
This account has been configured by the carrier to support FedEx Ground Economy
Select the services supported for your account. Available services are:
- FedEx Ground® Economy Media Mail
- FedEx Ground® Economy
- FedEx Ground® Economy Bound Printed Matter
- FedEx Ground® Economy (under 1 lb.)
This account has been configured by the carrier to support FedEx Ground Economy Returns
Check this box if your account supports Ground Economy return shipments.
Hub ID
Select the hub you will be using from Hub ID drop-down list.
FedEx One Rate
One Rate setup checkbox is removed from settings page in REST mode.
The Comprehensive Rate REST API automatically compares and applies the lower rate between the Standard Rate and the One Rate.
UI elements related to One Rate are disabled. The system automatically applies One Rate when appropriate.

International
These settings apply to International shipments.
Request FedEx Electronic Trade Documents for applicable shipments
Select the documents that you want FedEx to submit to the government electronically. FedEx will return a copy of the documents for printing. Documents that are not checked will not be submitted by FedEx.
FedEx account ETD settings override printer settings if any ETDs are selected and the shipment requires one of these documents. FedEx will not return documents that are not checked so you cannot print them even if they are enabled under Printing Profiles. If one or more documents are checked in FedEx settings, then the FedEx settings take precedence as far as what can be printed (either automatically On Ship or On End of Day, or later from Shipment History).
For example: If you only check the Commercial Invoice in FedEx settings, but both Commercial Invoice and Certificate of Origin documents are enabled under the Printing Profile, only the Commercial Invoice will be available for printing from Aptean Ship.
If you do not want to use ETDs but still want to print and send the documents yourself, do not check any documents here; instead, enable the documents in Manage Documents and check the Auto-Print option for those documents. If you do not check any documents on this dialog, a copy of ETDs you enable in Printing setup will be returned for printing and will print when the shipment is processed (if you have Auto-Print: On Ship checked). You can also print these documents later by opening the shipment and printing shipment documents.To only submit electronically and not print the documents, do not enable these documents here.
Mask account numbers for International Air Waybills
You can choose to have account numbers masked on the shipping label for security purposes. Note that the account numbers will print on FedEx Air Waybill copies used by operations and customs clearance. Choices are:
- Do not mask
- mask Transportation/Costs Account
- mask Duties/Taxes Account
- mask both
Select Images
Aptean Ship can submit your company’s header and signature to FedEx to use for ETDs. You can select up to 5 images for each FedEx account, from any images you previously added in Setup > Company.
FedEx Export AgentFile Communication Settings
The FedEx Export AgentFile® authorizes FedEx (by email, or through phone or fax) to file an EEI on your behalf. A filing fee and certain limitations apply. Select the communication method and then provide the contact information.
FedEx International Priority DirectDistribution Settings
This account has been configured by the carrier to support FedEx International DirectDistribution
The DirectDistribution setting is not available in REST mode, which is disabled in the Shipment option UI.
Dimensional Weight
For each FedEx service, you can enter custom dimensional weight divisors that are used to calculate the billed weight. When billed weight is not returned by FedEx rating, the dimensional weight factors below will be used to calculate it. The factors default to list (published) values, but can be modified here to reflect contract rates. This will not affect the charges, only the billed weight that shows on-screen. So, for example, If you have any freight rules that use the billed weight field, it will be updated so that freight rules work correctly.
Use the Revert to Defaults button to reset values to the original defaults.